Type 612 Disk Mastering Lathe Manual
Instruction and Service Manual
Version 1.0
Last updated on Friday, July 11, 2025
Section 1 Introduction
The Agnew Analog Reference Instrument Type 612 Disk Mastering Lathe is a fine precision instrument, designed to deliver several decades of reliable service, recording phonograph records and the masters for their manufacturing process at the highest level of performance and quality attainable to date.
It must be treated with the respect and care afforded to any precision instrument, to ensure it will always perform at its finest. The importance of correct assembly, adjustment and maintenance cannot be overstated. The maintenance requirements are minimal, but must always be precisely adhered to.
The lathe is shipped disassembled to protect against damage in transit. Each component is packed separately and will need to be reassembled and adjusted prior to use. Specialized tools will be needed for reassembly and calibration. The procedures detailed below must be carried out by suitably qualified professionals only. A decent understanding of electronics, mechanical engineering, physics and audio is required.
The equipment and procedures described herein are not intended for consumers or hobbyists. This is highly specialized professional equipment, intended for professional use only, in the phonograph record manufacturing industry. Failure to fully appreciate the level of complexity of the equipment and process, the level of operator skill required and the steepness of the learning curve if you are not already experienced in operating such equipment, will very likely result in disappointment. This is not a CD recorder.
Phonograph records were developed at a time when people had houses that they built and/or repaired themselves, drove motor vehicles with contact breaker points and carburettors that they adjusted as needed, could find their way around town without a pocket computer with an annoying voice sending them down someone else's driveway, and were generally of a substantial moral fiber. This is the original blueprint of a disk mastering engineer, tried and tested over the past century of recorded sound. The Agnew Analog Type 612 Disk Mastering Lathe does nothing to deviate from this honorable heritage and does everything to preserve it. This is exactly why people are still interested in phonograph records in the golden age of nothing.
Section 2 Location and Operating Conditions
The Agnew Analog Type 612 Disk Mastering Lathe needs to be installed on solid ground, in a location that is free of excessive vibration or noise. As the purpose of this instrument is to record phonograph records, it is strongly advised to set it up in an acoustically treated and isolated room, designed for critical listening. We recommend having such a space designed and built by suitably qualified professionals. We can offer a complete room design service if required. The floor system in the room is an important consideration. Some types of floating floor systems may require additional support structures if a disk mastering lathe is to be placed upon them. In addition, an uninterrupted, clean and stable supply of power is required for this equipment to operate at the level of performance it was designed for. The temperature and humidity should be controlled and should ideally remain constant all year round. It is recommended to maintain a temperature between 77°F (25°C) and 82°F (27.8°C) in the cutting room at all times. Humidity should be maintained between 50% and 75%. If the temperature and humidity levels fluctuate too wildly, the parameters (depth of cut, stylus heat, etc) will drift, and chip pickup may become difficult.
Section 3 Assembling the Lathe
3.1 Cabinet
Situate the lathe bench where it will be sited. Lift one side on a wooden or rubber block to gain access, and attach the two adjustable feet on the threaded holes underneath, screwing in by hand. Repeat on the opposite side to attach all four adjustable feet. Run the motor cables under the lathe bench before you remove the block.
Adjust the position of the bench as needed and place a spirit level on the top surface to level the bench using the adjustable feet, until it is level. Rotate the level 90° to ensure that it is level in all directions. If you are not certain about the accuracy of your spirit level, rotate it 180° after obtaining a level reading, to prove the reading. If the reading remains level, your spirit level is accurate. If not, please calibrate your level or obtain a more accurate level prior to proceeding.
3.2 Motor
Attach the three adjustable feet to the motor. Place the motor under the bench, in the square hole, so that it sits on the floor without coming into contact with the bench. Level the motor by placing the spirit level on the top flat surface of the motor and adjusting two of the three adjustable feet as required. Rotate the level 90° to ensure that the motor is level on all planes. Connect the wiring as needed.
3.3 Lathe Bed, Subplatter and Driveshaft
Place the two vee blocks on the lathe bench, left and right of the 3/8" (9.525 mm) hole for the clamp. The one on the left side should be placed as close to the larger hole as possible and the other one should be approximately equidistant to the 3/8" (9.525 mm) hole. Place the lathe bed on the vee blocks, flat side up. The hydrodynamic bearing unit should be above the larger hole, as the driveshaft will connect the subplatter bearing shaft to the motor through that larger hole on the lathe bench. The 3/8" (9.525 mm) threaded hole on the underside of the lathe bed should be directly above the 3/8" (9.525 mm) hole on the bench.
Thread the handscrew into the lathe bed from below the bench, through the 3/8" (9.525 mm) hole on the benchtop. Do not tighten yet. Place the spirit level on the lathe bed, lengthwise, to check if any adjustments are needed to the lathe bench. Adjust as needed. Rotate the spirit level 90° on the lathe bed, and rotate the lathe bed onto the vee blocks until you obtain a level reading. Tighten the handscrew very lightly.
Wipe the ways of the lathe bed with a clean cloth, soaked in Agnew Analog Type 1297 Machine Oil. Wipe the bearing unit in a similar manner.
Wipe the shaft of the subplatter as above, then put a generous amount of oil on it. Put some oil on the bearing unit on the lathe bed and place the subplatter shaft inside the bearing unit. If any resistance is felt, it is either because you have not squared up the shaft to the hole axis, or because there is dirt or debris on the shaft or in the bearing hole. Check, clean, adjust your grip and try again. Once the shaft enters the bearing unit, let gravity lower it as you are guilding it squarely by hand. The shaft will stop at the oil seal under the bearing unit. Fill the hydrodynamic bearing unit with Type 1297 Machine Oil all the way to the top. Then push down gently on the shaft to get it past the oil seal and all the way down. Rotate it by hand to ensure there is no binding.
Offer the driveshaft up to the subplatter bearing shaft. Line up the motor with the bottom of the driveshaft. Ensure that the driveshaft is lined up with both the motor shaft and the subplatter bearing shaft. This can be done by means of a spirit level or a try square. The better you line it up, the lower the speed errors (in the form of W&F) will be.
Once you have lined everything up, check the spirit level on the lathe bed again and rotate the lathe bed on the vee block until you get a level reading. Then, tighten the handscrew to secure the lathe bed on the vee blocks. Do not use excessive force and do not use any tools for this step! Thighten the handscrew by hand only!
Once the lathe bed is secured, the driveshaft couplers can be tightened onto the shafts, except for one side, towards the motor shaft.
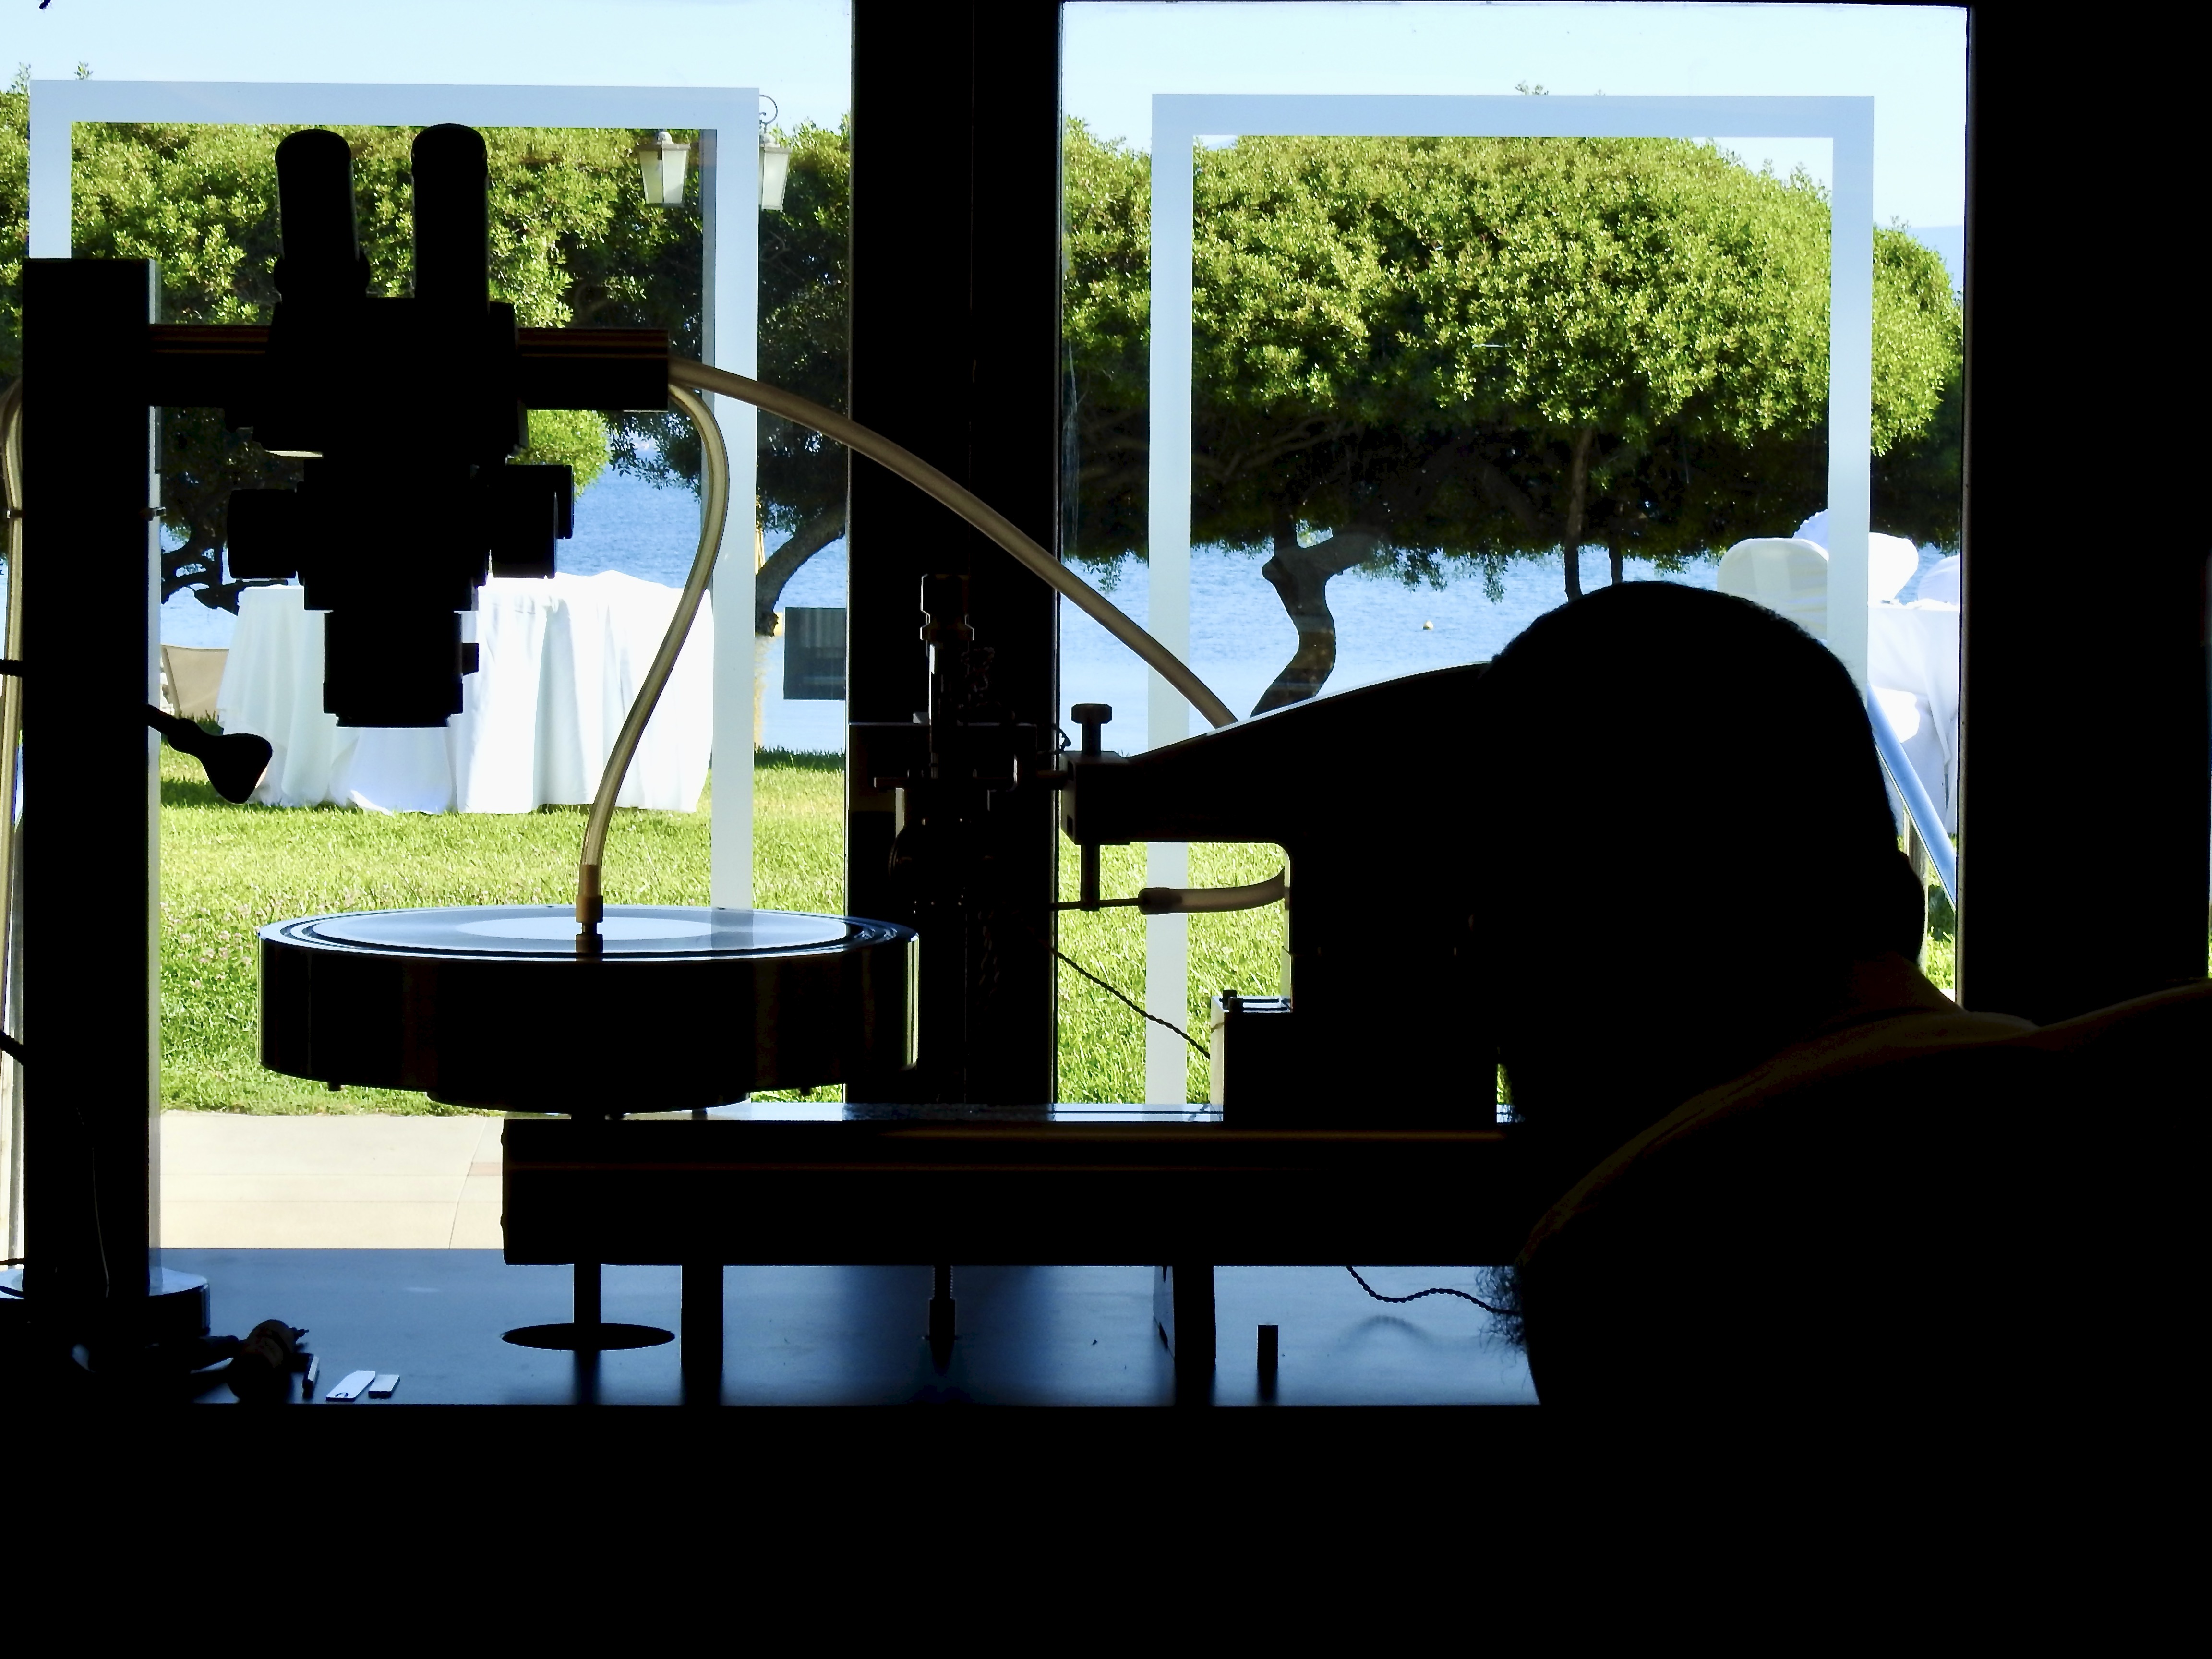
3.4 Type 6112 and Type 6114 Vacuum Platters
On the underside of the vacuum platter, there are three conical seats. One is marked red. The vacuum platter should be positioned on the subplatter, resting exclusively on three adjusters with conical heads. One of the adjusters is marked red. The red adjuster should be placed in the corresponding red seat. The other adjusters should be placed in the other two seats. The red adjuster is the reference and should not be adjusted! The other two adjusters should be adjusted as needed to level the vacuum platter. Leveling the platter is done by means of a dial indicator. The dial indicator should have a resolution of .0001" (.00254 mm) or higher. Rotate the platter and adjust the two adjusters until you achieve minimum deflection of the dial indicator. This can be done roughly at this point, the fine tuning will be done at a later stage and will be explained in further detail later on in this manual.
Once the vacuum platter is roughly dialed in, the remaining driveshaft coupler on the motor shaft can be tightened.
3.5 Carriage
The bottom (sliding) surface and guide pins of the carriage assembly should be thoroughly wiped with a rag soaked in Type 1297 Machine Oil. A generous amount of the same oil should be applied to the lathe bed slideway and the carriage should be placed on the bed with the guide pins engaging the slot. The two (or four on early versions) oil reservoirs should then be filled to the top with Type 1297 oil. The carriage should then be advanced by hand, all the way to the platter and all the way back, to ensure it will slide smoothly. If any resistance is detected, it is probably due to dirt or debris. Wipe with a clean rag soaked in Type 1297 Machine oil until a smooth sliding action is obtained.
3.6 Type 602 Cutter Head
Attach a disk recording stylus to the cutter head using the Agnew Analog Type 6019 Stylus Tool. The Agnew Analog Type 602 Cutter Head uses a taper-shank stylus, of the Transco 320 or Adamant NSH-2 or NSH-2S variant (or one of the various modern equivalents available in varying levels of quality). The cutter head does not care if the stylus is made of sapphire, ruby, diamond, or anything else. If it is manufactured properly and the geometric parameters (which are defined by the laws of physics and not by personal opinion) conform to the requirements of the material of the blank recording disks to be used, then it will work just fine. Please note that the length of the stylus is critical for obtaining a decent stereophonic image. A recording stylus of incorrect length will still record sound on disk, but it will skew the stereophonic image. The Transco 320 and Adamant NSH-2/NSH-2S are identical in length and this is the only correct length.
Handle the stylus by the heater wires only! Keep your hands off that jewel and its shank! Bring the stylus up to the conical stylus seat of the cutter head and let it drop in, with the heater wires facing towars the side of the cutter head and the cutting face of the stylus facing towards the opposite side (wrong orientation on purpose). Use your fingernail to lightly push it in just so it stays in place. Engage the stylus tool, stepped slot side facing towards the stylus, between the heater wire coil and the square collar of the shank. The step on the stylus tool should engage the square collar so that the stylus tool can rotate the stylus.
Simultaneously apply a small amount of downward force to seat the stylus, while rotating it so that the heater wires face towards the front of the cutter head (the side with the heater wire terminals and Agnew Analog logo) and the cutting face of the recording stylus facing towards the rear. Please note that the square collar is not aligned with any of the facets of the jewel. Align based on the cutting face, not the collar! You will need to use a microscope to see what you are doing. Use the torque tube sides or front face as a reference surface for alignment.
The taper shank recording stylii work on the same principle as taper tooling in machine tools. However, as the recording stylii are much smaller, they require a lot less force. If you use too much force, you will destroy the stylus, the cutter head, or both. There is a lot of ongoing research on the importance of precise alignment of the recording stylus (the lack of producing what is known as zenith error), so time spent learning how to accurately align the stylus is time wisely invested.
3.7 Suspension Unit
The suspension unit is shipped completely disassembled to prevent damage in transit. Start by mounting the C-shaped bracket onto the carriage arm slot, with cylindrical spacers, if provided (early versions did not use the cylindrical spacers).
Attach the dashpot plunger to the threaded hole at the back of the suspension unit and secure it with a setscrew from the top.
Remove the knob from the threaded depth adjustment rod with a spring attached to the other end. Insert the threaded rod through the hole in the L-shaped bracket at the front of the suspension unit and thread the knob back on to keep it in place.
Attach the suspension block. The flat bar at the top of the suspension block has two conical seats machined on its underside. The bearings on the two ends of the C-shaped piece bear against these conical seats. The dashpot plunger sits inside the dashpot when the bearings are seated. Use the cylindrical spacer between the suspension block and L-shaped bracket base, to keep the suspension block locked in position.
Attach the cutter head to the mount adapter by means of the two screws provided. Attach the mount adapter to the slot at the front of the suspension unit and secure with the three setscrews on the side. Do not overtighten. Remove the cylindrical spacer locking the suspension block.
Lower the head by pulling up on the cutter head lift/drop knob at the top of the suspension unit, ensuring that the carriage is pushed all the way to the right, so that the cutter head will not touch the vacuum platter when lowered. Adjust the depth of cut knob to keep the stylus approximately at the height of the top surface of the vacuum platter. Then lift the cutter head by pushing down on the cutter head lift/drop knob.
Place a blank disk on the vacuum platter. Advance the carriage by hand until the recording stylus is over the blank disk. Slowly and carefully lower the cutter head until the recording stylus is touching the blank disk surface. In this position, the front face of the cutter head must be at an angle of 88° to 89° to the blank disk surface, producing a stylus rake angle of +1° to +2°. As per the relevant ASA (American Standards Association, now ANSI, the American National Standards Institute) standards, positive values of cutting tool rake angle are in the "digging in" direction, while negative values are in the "stroking" direction. A value of zero denotes that the cutting face is at exactly 90° to the workpiece, which in this case, is the blank recording disk surface.
If the cutterhead angle is not within the specified range, the entire suspension unit needs to be raised or lowered, by loosening the mounting screw and moving it as required. When the angle is correct, it should be tightened into position. To safeguard against accidental damage, always keep the cutter head in the lifted up position before loosening and moving the suspension unit. Tighten into position before lowering the cutter head again.
Once the Stylus Rake Angle (SRA) is adjusted as above, the head should be lifted and the carriage positioned all the way to the right by hand. The chip suction tube should be attached to the retainer rod and the assembly should be moved to the uppermost position and away from the cutter head, by loosening the setscrews on the side of the carriage arm mount block and tightening them again to keep it in position.
The carriage should be advanced so that the stylus is over the blank and the cutter head should be lowered onto the blank disk. The setscrews holding the chip suction tube retainer rod should be loosened and the assembly manipulated by the knob at the top, to bring the chip suction tube between the blank disk and the cutter head, without touching either of the two. The chip suction tube itself should be adjusted in or out, until it is positioned approximately .080" (2.03 mm) behind the recording stylus. It should be locked into position by means of the setscrew on the side of the retainer rod.
The cutter head should then be lifted up and the carriage moved to the right.
3.8 Hydraulics
The hydraulics assembly should be positioned behind or to the side of the lathe. It can be hidden away as long as the hydraulic lines will reach with a bit of slack. The assembly should be suspended on 10" to 12" (254 mm to 304.8 mm) of open-cell polyurethane foam (or several thinner pieces layered) to provide damping. The hydraulic cylinder should be attached to the mounting bracket, which should then be affixed to the right side of the lathe bed, by means of two 1/4" screws and washers, which should be left loose, allowing the cylinder assembly to be moved up or down as needed. The cylinder rod should be screwed into the end of the carriage block as the carriage block is pushed towards it by hand. It should be locked in place by means of the locknut provided. The cylinder should be carefully aligned with the carriage block and the 1/4" screws holding the hydraulic cylinder mounting bracket to the lathe bed should be tightened.
From this point onwards, it will no longer be possible to move the carriage by hand. It will only be possible to move it by means of the hydraulics control unit.
The hydraulics control unit should be connected to the motors on the hydraulics assembly and to the power supply unit. Caution should be exercised when advancing the carriange under power, up until the limit switches are calibrated. Instructions on this will follow later on. Until the limit switch calibration step is completed, it should not be assumed that the carriage will stop at the end of its travel. If left under power, it will crash and serious damage will occur.
3.9 Microscope
The groove inspection microscope slide arm should be mounted on the lathe bench, on the left side, using the mounting hole provided. The single mounting screw is inserted from the underside of the bench and tightened. The round slide arm should then be wiped with a clean rag soaked in Type 1297 Machine Oil and the moving part should be advanced all the way to the right and back to the left several times, with more oil added until the sliding action is smooth.
The microscope body should then be attached to the moving part of the microscope arm. The microscope head and objective lens should be attached to the microscope body. Instructions for microscope adjustment procedures will follow later on.
3.10 Type 192 Stylus Heater Supply Unit
The heater wiring from the cutter head (red/purple twisted pair) should be attached to the terminal posts on the Type 192 Stylus Heater Supply Unit, which should be mounted in a standard 19" equipment rack, preferably positioned to the right of the lathe.
3.11 Cutting Amplifiers
The two Speak-On connectors on the cutter head wiring should be connected to the driver transformer units, the other side of which should connect to the outputs of the cutting amplifiers, which should be mounted in the 19" equipment rack. Depending on the available power line voltage in your area, a separate power supply unit may or may not be needed.
3.12 Vacuum Suction
The Type 292 Vacuum Suction Control Unit should be mounted in the 19" equipment rack and connected to the vacuum pump and power supply unit (depending on the available power line voltage in your area). The vacuum pump should be placed in a separate room and filled with Agnew Analog Type 1293 Vacuum Pump Oil. The chip jar should be mounted behind the lathe. The chip suction hose should be kept as short as possible, running from the chip jar to the chip suction tube, through the microscope slide arm. The vacuum platter hose should connect from the nipple on the chip jar to the vacuum fitting for the vacuum platter, through the microscope slide arm.
Section 4 Adjustment and Calibration
4.1 Leveling
The lathe bench, lathe bed and motor, should all be level for the lathe to achieve the level of performance it was designed and manufactured for. This should be done with a precision spirit level, placed on the lathe bench, then on the lathe bed, and finally on the motor. The level should be rotated 90° on each surface, to level the surfaces both in the left-to-right plane and the front-to-back plane.
The Type 612 lathe bench and Type 631 motor have adjustable machine feet, which can be rotated to extend or retract them, thereby adjusting the leveling of the unit. Once the adjustment is completed, the feet can be secured by means of the locknuts provided, to ensure that the units remain level. The Type 612 lathe bed is supported on two precision Vee blocks. These provide accurate leveling by default in the left-to-right plane. The lathe bed can be rotated on the Vee blocks to achieve perfect leveling on the front-to-back plane. Once the lathe bed is level, a handscrew under the lathe bench top can be tightened by hand to secure the lathe bed in place.
Spirit Level Proving and Calibration Procedure: Spirit levels are inherently self-proving with regards to the accuracy of their reading. Once the first surface (lathe bench) is adjusted to obtain a level reading on the spirit level, the spirit level should then be rotated 180° and placed back on the same surface. If the reading is identical, then the spirit level reading is accurate. If, however, a different reading is obtained when the level is rotated 180°, this would indicate a defect on the spirit level itself. Many of the higher quality spirit levels are adjustable and can be calibrated by repeating the process of rotating the level 180° and adjusting both the surface and the level, until the reading remains identical upon rotating the level 180°.
4.2 Vacuum Platter Run-Out and Eccentricity Calibration
The Type 6112 and Type 6114 Vacuum Platters are designed to sit on three adjuster screws. The underside of the platters features three conical seats, one of which is marked with red paint. The subplatter has three adjuster screws with conical tips, which engage the conical seats at the bottom of the platter. One of the adjuster screws is marked with red paint and should go into the corresponding seat with the red paint. This adjuster screw MUST NOT be adjusted. The other two adjuster screws are used to level the platter.
The leveling process requires a dial indicator with a resolution of .0001" (.0025 mm) or better, on a stable stand. The indicator probe should be positioned on the outermost ring on the top of the platter. The platter should be rotated to align the indicator probe with the adjuster screw marked in red paint. The indicator should be zeroed at this point and the platter should be rotated clockwise until the indicator meets the next adjuster screw. The adjuster screw should then be slowly rotated by means of a suitable hex wrench, ensuring first that the locknut has been backed off with an open ended 7mm wrench. The goal is to approach the reading obtained over the reference adjuster screw marked in red. Repeat for the last adjuster screw and then rotate the platter to align the indicator probe with the red adjuster screw again, to check the reading. It is very likely that the reading will have drifted, as raising any of the other two adjusters will cause the platter to be lowered over the red adjuster and vice versa, lowering any of the other two adjusters will cause the platter to be raised over the red adjuster. As such, it is best to adjust in small increments. When the adjustment is completed, the locknuts should be tightened while holding the adjuster still with a hex wrench and observing the dial indicator for any drift.
As machined and tested at the factory, the Agnew Analog vacuum platters can achieve a total indicated run-out (TIR) of +/- .0001" (.0025 mm) or better, if the adjustment procedure has been done with due care and the components have not been abused or otherwise mishandled after leaving the factory. However, it will be observed that upon first setting up a new lathe, the reading will most likely drift soon after the initial adjustment. It usually takes a few weeks and 3-4 readjustments for everything to settle in. After this initial running-in period, the readings should remain stable for longer periods of time and should be routinely checked and adjusted annually or as needed.
The Agnew Analog platters are also adjustable for eccentricity. While this is considered of little importance for cutting masters for plating and pressing, as the center is lost on these and the stampers need to be center-punched again prior to the pressing stage, it becomes quite important when making instantaneous recordings, to be played back directly (dubplates, reference acetates, or small runs of records).
To measure eccentricity, the probe of the dial indicator must be positioned on the center spindle directly, close to the platter, where the record would ride. Readings obtained with the probe on the periphery of the platter may not be accurate.
If eccentricity is detected, the 8 hex head machine screws on the underside of the platter must be loosened by a turn. The entire platter can then be moved as needed against the bottom plate, to eliminate eccentricity. This adjustment is a bit more fiddly than the run-out adjustment but does not tend to drift or even require readjustment. When the eccentricity reading obtained on the dial indicator is deemed satisfactory, the 8 screws should be tightened again in a star pattern, as one would approach the tightening sequence of the bolts on the cylinder head of an internal combustion engine (but using considerably less torque).
Dial Indicator Calibration: Please note that any of the aforementioned adjustment procedures are entirely pointless if one does not feel confident that the dial indicator in use is accurate in its readings. A new dial indicator will often come with a calibration chart, displaying the reading error of the instrument. This calibration chart is not an indication that the instrument will produce an accurate reading. It is quite literally an indication of how much the instrument will deviate from an accurate reading. If the deviation is significant, but known, an experienced hand may be able to mentally compensate for the shortcomings of the instrument and still obtain the desired result. If experience using such instruments is in short supply, it is highly questionable whether any adjustments made will be of any benefit, unless a very accurate instrument is used. Very accurate instruments that can be trusted are certainly available on the market by several well-known manufacturers and investing in such an instrument now, if one is not already available, would be a very wise move. Unlike spirit levels, dial indicators are not self-proving and cannot be calibrated or adjusted by the user without significant experience and a metrology laboratory at your disposal.
References can be found in other texts describing methods of leveling a platter using the lathe microscope only. This method is very inaccurate and not recommended. It was originally suggested by manufacturers of lathes whose platters had errors an order of magnitude higher than the Agnew Analog lathe, while utilizing microscopes of lower quality, with a much shallower depth of field. The microscope used on the Agnew Analog Type 612 disk mastering lathe has a very wide depth of field and a much clearer picture. Errors as small as those that can be measured and eliminated by using a decent dial indicator would not be detectable or quantifiable by using the lathe microscope. The lathe would still work but it would not be reaching its full performance potential.
4.3 Microscope Adjustments and Reticle Calibration
The stereoscopic microscope supplied with the lathe needs a number of adjustments before it will display a clear, high-resolution image. Begin by ensuring that the eyepiece tube with no adjustment is on the right side of the microscope head and the eyepiece tube with the adjustment ring is on the left side. If you are left-eye dominant you may wish to reverse the order here. Place the eyepiece with the measurement reticle and adjustable top into the right (non-adjustable) eyepiece tube. Turn on the illumination and look through the microscope with the right eye only (close the left eye). Adjust the focus using the knob on the back of the microscope until the image is clear, ignoring the measurement reticle itself. The microscope is designed to focus when the objective lens is 3 1/2" (90 mm) from the object to be viewed. When you have focused the image, then rotate the adjustable top of that eyepiece until the measurement reticle also becomes clear and in focus. Adjust the mircoscope focus again if needed. Once both the measurement reticle and object are clearly visible, then close your right eye, open your left eye, and look through the left eyepiece only. Adjust the left (adjustable) eyepiece tube until the image becomes clear, without touching the focus knob on the back of the microscope.
When this is done, open both eyes. Now adjust the small knob on the side of the microscope head to adjust the inter-occular distance. This knob will alter the distance between the two eyepiece tubes. Do not attempt to move the eyepiece tubes by hand, only adjust by means of the small knob. The goal here is to obtain an image which is a perfect circle. If the circle is more of a figure of 8, or an ellipse, adjustment of the inter-occular distance is needed.
When a perfect circle is obtained, readjustment of the measurement reticle may be required. Adjust with both eyes open, until the image is perfectly clear and the measurement reticle is clearly visible over the image.
The lathe microscope comes with a measurement reticle. Different magnifications can be selected by means of a knob, but the most popular setting for groove inspection is 56x, obtained with the selector on the position marked 7. In this setting, each line on the measurement reticle corresponds to .00056" (.0143 mm). If accurate measurements are to be made using the microscope reticle, gage pins, end standards, or calibrated microscope targets should be used, to determine the exact resolution and scaling of the microscope as set up.
4.4 Pitch Calibration
The most reliable method for calibrating the pitch system in Lines Per Inch (LPI), Grooves Per Inch (GPI), Lines per mm (L/mm or R/mm), or any other system prefered, is by cutting silent grooves and then measuring the distance from one groove center to the next groove center, using the lathe microscope, which comes with a measurement reticle. This can be done at a few different pitch settings (the pitch knob is graduated in numbers from 1 to 10) and a calibration sheet can be created, indicating the actual pitch measured at each setting of the knob, for the particular setup of the particular machine.
4.5 Depth of Cut Calibration
The basic depth of cut is mechanically set by means of a knob. However, it is much simpler to measure groove width rather than groove depth. As the geometry of the groove is known (included angle of 90), the groove width is twice the depth, or in other words, the groove depth is half of the measured width. A basic groove width setting of .003" (.0762 mm), as measured with the lathe microscope, is the recommended starting point. The width should never be less than .002" (.0508 mm) and should also not be set above .004" (.1016 mm), to ensure compatibility with a wide range of reproduction systems. It is a good habit to become familiar with the "scaling" of the depth control knob, once the basic setting is made. For example, if the basic setting is .003" (.0762 mm), how much does this increase or decrease for a 1/4 turn of the knob? This will vary depending on how the lathe is set up and it is good operating practice to know how much adjustment is needed to reach a width of .004" (.1016 mm) or .002" (.0508 mm), on the particular setup in use.
4.6 Lead-in and Spiral Pitch Adjustment
There is a dedicated knob for adjusting the lead-in and spiral pitch. Adjust as required. The knob is graduated from 1 to 10 for easy recall.
4.7 Lead-out Pitch Adjustment
There is a dedicated knob for adjusting the lead-out pitch. Adjust as required. The knob is graduated from 1 to 10 for easy recall.
4.8 Limit Switch Adjustment
The Type 612 hydraulic actuation system uses limit switches for automation purposes. These can be used to automatically stop the carriage at the ends of its travel to prevent crashes, but they can also be used to automatically stop the carriage at the start diameters of each size of record, and automatically engage lead-out mode at any diameter required. The limit switches are physically moved to the required position and tightened down. Any number of limit switches can be utilized. Adjustments should always be made with the head up and the platter stationary, to reduce the risk of collisions. Once the adjustments have been made, a test run should be initiated with the head raised, and the operator prepared to stop the carriage immediately, should the limit switches not function as expected.
Section 5 Operating the Lathe
- Ensure the oil in the platter bearing cup and carriage reservoirs is at the recommended level, which is all the way to the top.
- Advance the carriage all the way to the left and back to the right again to distribute the oil on the slideways before starting the day.
- Switch on the cutting amplifiers, have the source cued and ready to start, switch on and engage any signal processing units that are to be used.
- Place a blank disk on the vacuum platter. If any of the vacuum ports are visible, in case of blank disks of smaller diameter than the platter, plug them using the plugs provided.
- Place the vacuum fitting over the center spindle of the platter.
- Start the platter motor at the desired speed.
- Advance the carriage to the start diameter of the disk.
- Start the vacuum suction.
- Start the stylus heat.
- Set the recording pitch as required, depending on the duration of the material on the side to be cut, and start the carriage.
- Lower the cutter head to start cutting.
- Quickly press the lead-in button.
- After the lead-in is complete, it is customary to wait for one or two full revolutions of the platter at recording pitch, before starting the music. Start the music at the desired time.
- Press the spiral button between selections, if needed.
- After the program material has ended, it is customary to wait for a full revolution of the platter at recording pitch before proceeding with the lead-out. Hit the lead-out switch at the desired time. If the limit switches have been properly adjusted, the carriage will automatically stop at the end diameter.
- As soon as the carriage stops, wait for 1 1/4 revolution before lifting the cutter head, to complete the locked groove. Lift the cutter head after that.
- Stop the stylus heat.
- Return the carriage back to the beginning and switch it off.
- Stop the vacuum suction.
- Stop the platter motor.
- Inspect the cut using the lathe microscope.
- Scribe the catalog number and any other details on the recorded disk and remove from the platter.
Section 6 Routine Maintenance
6.1 Daily
- Check oil level in carriage reservoirs and top up as required.
- Check oil level in hydrodynamic bearing unit and top up as required.
- Wipe lathe bed slideway and microscope slide arm with a clean rag soaked in oil.
- Before operating the lathe, advance the carriage using the fast advance function, all the way to the left and all the way back to the right, to distribute the lubricant along the slideways.
6.2 Monthly
- Check oil level in vacuum pump and top up as required.
- Ensure that there are no leaks around the hydraulic lines.
6.3 Yearly
- Drain and replace vacuum pump oil.
- Check vacuum platter run-out with dial indicator. Adjust if necessary.
- Check condition of dashpot oil. If visibly contaminated with dust or dirt, drain and replace.
6.4 Advanced Procedures
Bleeding the hydraulic system is a procedure that is not normally required by the user. The system has been bled at the factory prior to shipping. However, rough handling during shipping, or accidentally disconnecting one of the hydraulic lines, can cause hydraulic fluid leaks and air to enter the system. If this happens, the carriage motion will be jerky and uneven. If this behavior is observed, the system will need to be bled. Bleeding a hydraulic system is messy and time-consuming. Agnew Analog is currently developing a bleeding system that would minimize the inconvenience, should bleeding the hydraulic system ever become necessary. Please contact Agnew Analog for instructions on bleeding the system, if you are experiencing leaks or jerky carriage motion.
Section 7 Troubleshooting
- Visible platter wobble: See 4.2
- Platter will not spin: Check electrical connections to motor and ensure power is reaching the control unit and motor. Ensure that couplers are tight on the shafts.
- Platter will spin but there are speed stability issues: Ensure that the couplers are tight on the shafts. Ensure that the motor is on solid ground and lined up with the platter shaft.
- Jerky or uneven carriage motion: See 6.4
- Carriage will not move: Check couplers on the hydraulics unit.
- Cutting stylus will not reach the record: See 4.5. Additionally, ensure that the cutter head wiring and chip tube are not inhibiting the full range of suspension unit travel.
- Noisy silent groove: Worn out stylus. Replace and see 4.5 for correct depth of cut adjustment. Ensure stylus heat is operational.
- Inconsistent chip pickup: Position the chip tube correctly. See 3.7. Ensure the chip jar is not overly full and that the chip suction tube and hoses are not clogged. Ensure the vacuum pump oil level is adequate and that it is operational.
- No sound: Ensure cutting amplifiers are powered on and the cutter head wiring is correctly connected. Ensure that the cutter head protection fuses have not blown.
- Sound too resonant/distorted: Ensure that the stylus is properly seated in the cutter head socket, is correctly aligned, depth of cut is set as per 4.5 and geometry is set as per 3.7.
- Start and stop positions appear to be in the wrong place: See 4.8